
Add your first block to checkout
Showing a block at checkout takes two parts. First you create the block in Checkout Buddy, then you place it in checkout using Shopify’s Checkout Editor. The block won’t appear until both are done.
Requires: Shopify Plus (or a development or Plus sandbox store).
Part 1: Create the block
Section titled “Part 1: Create the block”-
In Checkout Buddy, open Customizations and click Create customization.
-
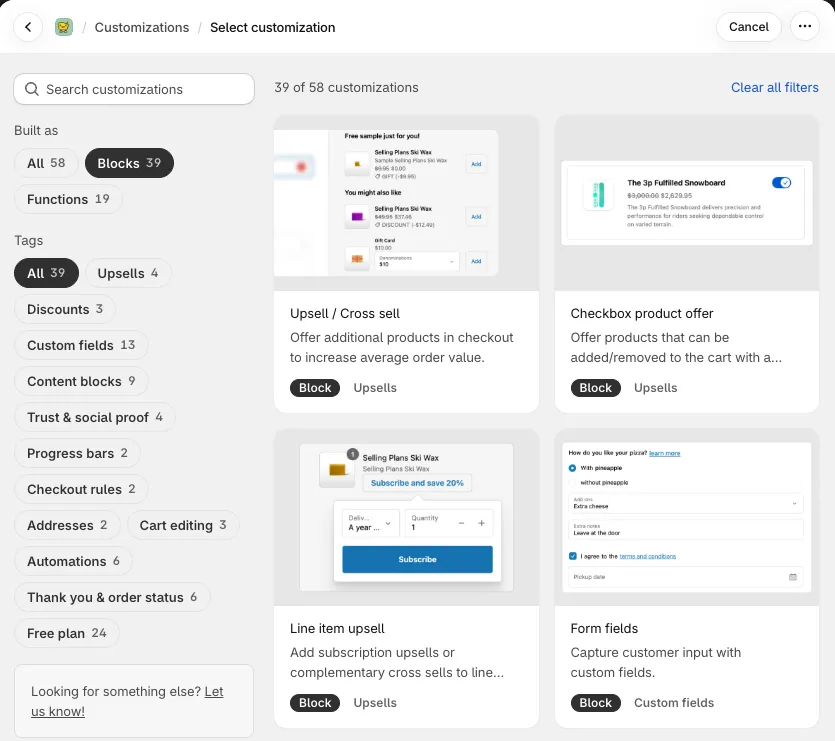
Pick a block. Use Built as → Blocks or the Tags filter to narrow the list, or search by name.
-
Give the block a Name. Customers don’t see it, but for form fields the name is used as the label on the order, so pick something readable.
-
Fill in the block’s settings. Each block’s page in this help center explains them.
-
Under Display rules, keep Show for all orders for now. You can add rules later.
-
Click Save block.
-
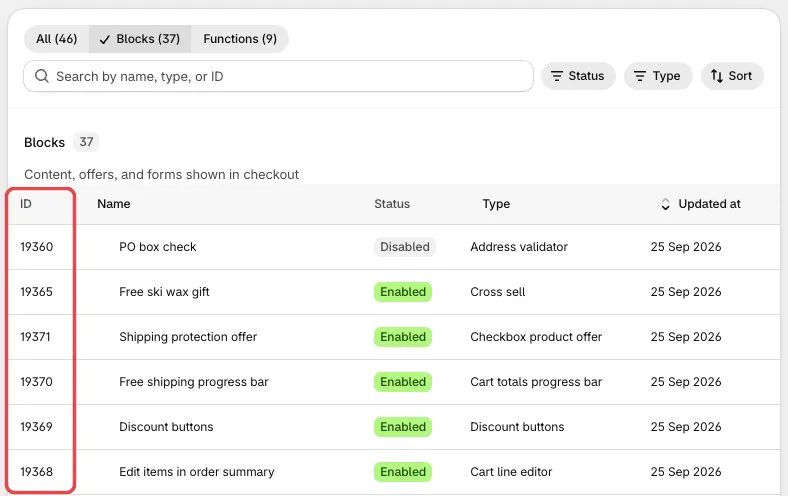
Back on Customizations, note the number in the ID column. You’ll need it in part 2.
Part 2: Place it in the Checkout Editor
Section titled “Part 2: Place it in the Checkout Editor”-
In Shopify admin, go to Settings → Checkout and click Edit next to your active checkout configuration. You can also use the Add blocks to checkout link on Checkout Buddy’s Help page.
-
Use the page selector at the top to go to the checkout step where you want the block: Information, Shipping, or Payment.
-
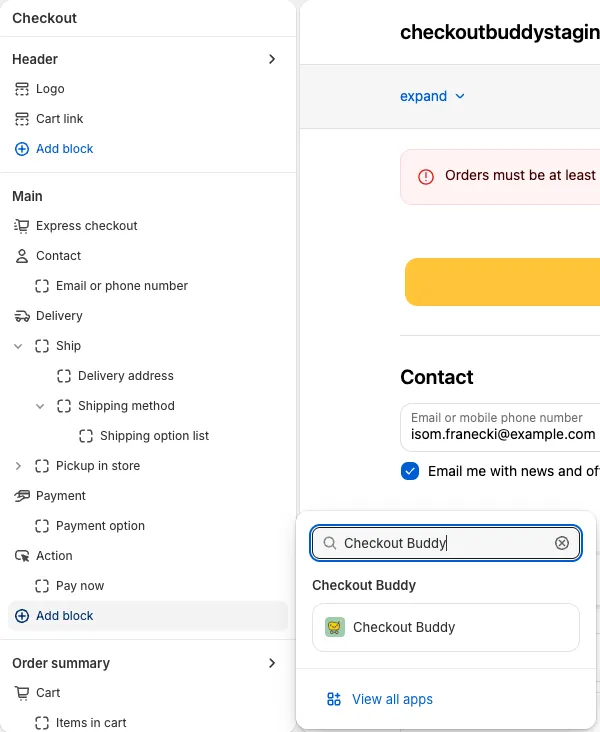
Click Add block in the section where you want the block, and choose Checkout Buddy.
-
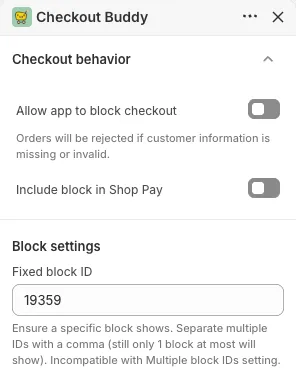
In the app block’s settings on the left, enter your block’s ID in Fixed block ID.
-
Use the up and down arrows on the app block in the preview to adjust its position if needed.
-
Click Save in the top-right corner.
Open your store, add a product to the cart, and go to checkout to see the block.
Choosing where to place it
Section titled “Choosing where to place it”Some blocks only work in particular places:
- Line item text, Line item upsell, and Cart line editor show under each product in the order summary. Place them in the cart line item location. See placement.
- Text under a shipping option goes in the shipping option location.
- Apply discount code, Remove discount code, Line item remover, Apply checkout attribute, and Apply line item attribute don’t show anything. Place them anywhere on the page where they should take effect, usually the first page of checkout.
- Thank you and order status page blocks use a different app block called Checkout Buddy - Thank You & Order Status Page. See thank you and order status pages.
If the block doesn’t appear
Section titled “If the block doesn’t appear”Check these in order:
- The block’s status is Enabled in Checkout Buddy.
- The Checkout Editor was saved after you added the app block.
- Fixed block ID matches the ID on the Customizations page.
- The block’s display rules pass for your test cart.
- You’re looking at the checkout page the app block was placed on.
Still stuck? See block not showing.